
Following on from our How to create a WordPress Multisite install, in this guide, we’ll discuss how to create a new site under your WordPress Multisite install.
1. Login to WordPress
Login to your WordPress dashboard

2. Navigate to the Multisite Sites Dashboard
Navigate to the multisite sites dashboard “My Sites” > “Network Admin” > “Sites”

3. Add New Site
Click the “Add New” button

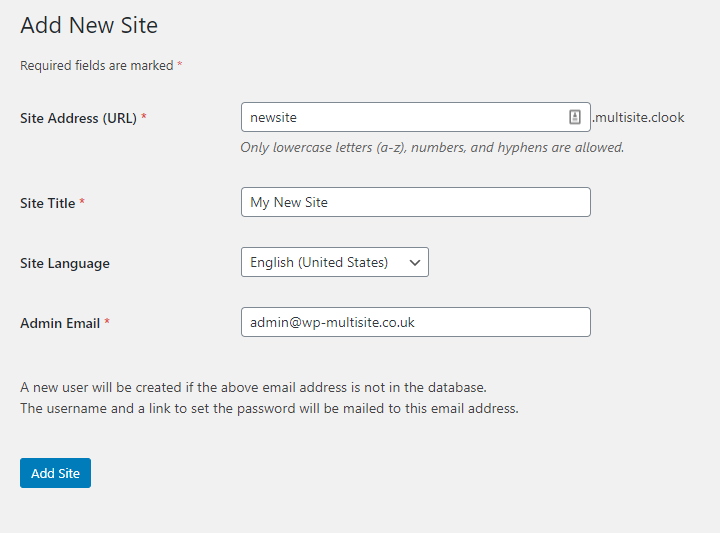
4. Enter the new site information.
Note: this multisite install has been configured to use a subdomain. The siteurl will be manually changed in the next step.
5. Edit the new site’s siteurl
Navigate to “Sites” > “All Sites”

6. Edit the new site’s siteurl
Click on “Edit” underneath the site you have just created.

7. Edit the new site’s siteurl
Enter the full URL in the “Site Address (URL)” field, prefixed with https://www.
e.g: (replace yourdomain.tld with the actual domain you wish to use)

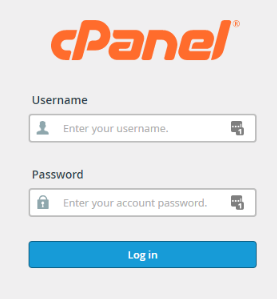
8. Add the domain to cPanel
We’ve now configured the domain in WordPress, the next step is to add it to cPanel so that the domain actually resolves
Login to cPanel
9. Click domain Aliases

10. Add the domain
Enter the domain in the “Domain” field and click the “Add Domain” button.
This creates the domain and maps it to the public_html directory

Summary
Adding an additional site to a WordPress Multisite install can be a little daunting at first.
By following the steps above, you’ll have a new site online in a few minutes.
In our next guide on WordPress Multisites, we’ll be showing you how to add SSL certificates using AutoSSL


