
You’ve probably already heard of CloudFlare. They are a very popular Content Delivery Network (CDN) provider, offering plans on a freemium basis. In the guide below I’ll explain how to integrate CloudFlare with WordPress.
The benefits of using a CDN have previously been discussed in our how to improve WordPress speed blog. In summary, a CDN enables you to take some strain off your server by delivering your static content from a CloudFlare server closest to your end user.
Create a CloudFlare account
If you don’t have a CloudFlare account, create one here and add a domain using this tutorial
Install the CloudFlare for WordPress plugin
If you’ve not installed a WordPress plugin before, please follow this guide detailing how to install a WordPress plugin
Login to your WordPress dashboard, go to the plugins section, search for ‘CloudFlare’, and then install and activate the CloudFlare plugin.

Launch the CloudFlare plugin
Now that you have installed and activated the CloudFlare plugin, you can go ahead and configure it
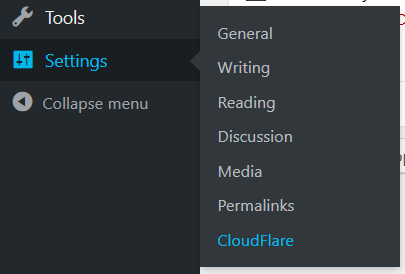
Click on the “Settings” link on the WordPress dashboard and then click the CloudFlare link
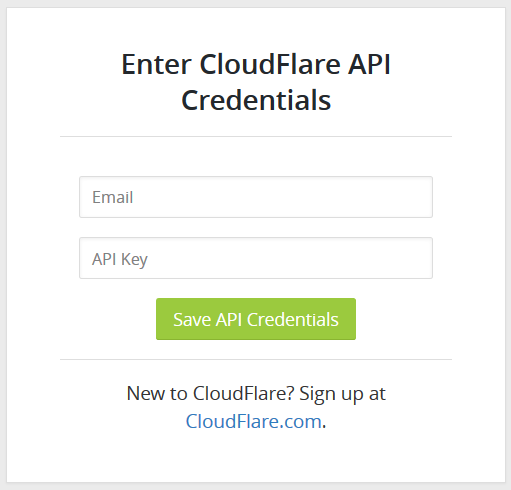
Enter CloudFlare credentials
Enter your email address and your CloudFlare API key
You can find your API key by following this guide
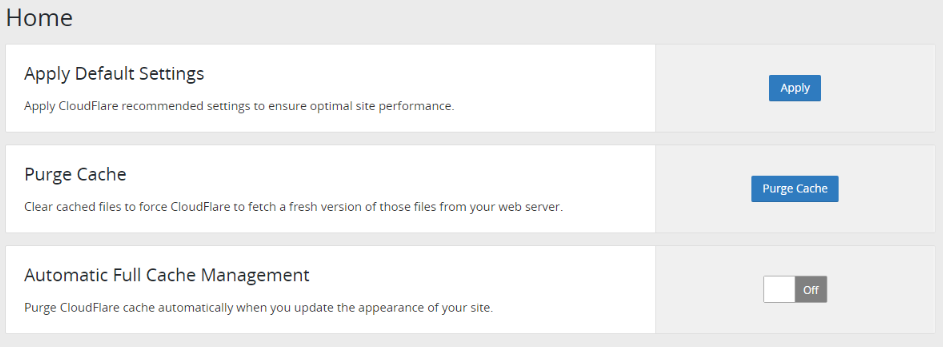
Apply CloudFlare settings
Click the “Apply” button in the Apply default settings section
Turn Automatic Full Cache Management on in order to enable a purge of cache when you update your site.
Your WordPress site is now connected to CloudFlare and using optimal settings.
Did you know…
At Clook, one of our specialisms is providing WordPress hosting, if you’d like to find out more, please get in touch with us.


