Last week we discussed how to manually backup WordPress using cPanel.
Today I’ll show you how to manually restore WordPress using the cPanel backup we created.
1. Login to your cPanel account
Navigate to your login page for cPanel. This is normally your domain name or IP address followed by /cpanel
e.g. http://yourdomainname.com/cpanel
2. Under the files section, click on the backup Wizard Icon
![]()
3. Click on the “Restore” button to start the restore process.

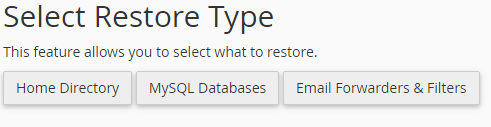
4. On the select restore type page, click on the “Home Directory” button
A well-managed hosting platform removes most of this hassle.
On Clook hosting, WordPress sites are backed up automatically, with proper tools and real people if something goes wrong.
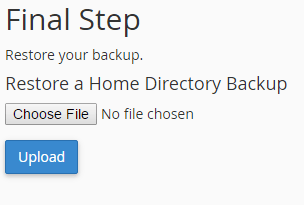
5. Click the “Choose File” link, locate the .gz home directory backup and then click the “Upload” button
6. Now that we’ve restored the file data, we can now restore the database.
Click on the “Restore” button again.
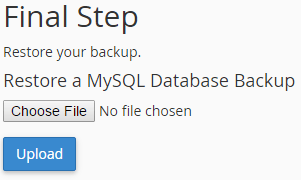
7. On the select restore type page, click on the “MySQL Databases” button
8. Click the “Choose File” link, locate the .sql.gz database backup and then click the “Upload” button
Summary
If you’ve followed the guide in full, you’ll now understand how to manually restore WordPress using cPanel, from an existing backup.
If you are currently a Clook customer, we also automatically back up your site daily and retain a weekly and monthly copy.
If you have any questions, we’d be delighted to hear from you.
If you’ve had to manually restore WordPress once, you’ll want to avoid doing it again.
Moving your site to Clook means backups, restores and support are handled properly — without scripts, shortcuts or outsourced help.


